Coloured Pencil Assignment #2, Face Lesson
Day 1
|
|
| |
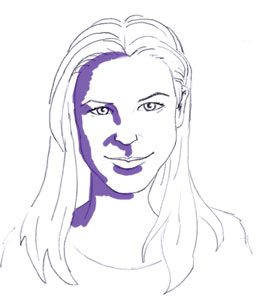
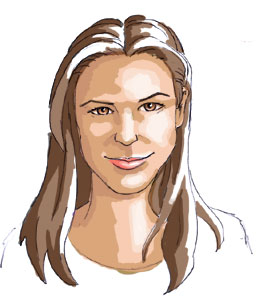
1. Use dark purple or dark brown with average pressure, (or dark blue with light pressure in a pinch).
|
|
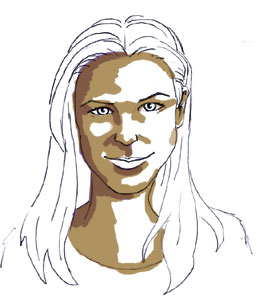
2. Use a light brown with average pressure. Blend over top of layer 1.
|

|
|

| |
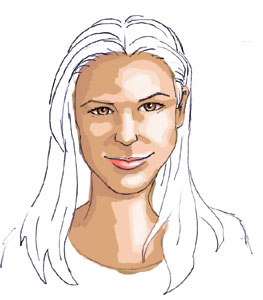
3. Use peach colour, or whatever colour you want the flesh to look like. Blend over top of layer 2.
| |
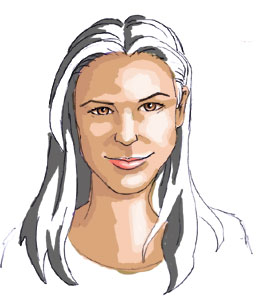
4. Use a light peach, or a regular peach with light pressure, over remaining areas.
|
Try to blend the edges of the layers so that there is no obvious jump from one colour to the next. Push down each layer with a lighter colour. Use white to push down the peach, peach to push down the brown, and brown to push down the purple.
|
Day 2

|
|
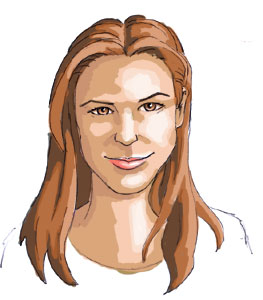
| 5. Mouth: use light red on the left and top of the lips. Eyes: use a dark colour on the tops of the eyes, leaving the bottom white.
|
| 6. Mouth: Use pink to push down the red. Colour around the edge of the white area, but leave some white. Eyes: with the lighter colour, cover the bottom and push down the darker colour. Go over the upper eyelid and pupil in black if necessary.
|
|
|
| 7. Use black or dark brown and average pressure for this layer. Make pencil strokes that follow the direction of the hair.
|
| 8. If your face has a dark complexion, use either black with light pressure or dark brown. For a light complexion, use light brown. Blend into layer 7.
|
|
| 9. Choose a lighter colour, either dark brown, light brown, or pale yellow, depending on what you used in the last two layers. Use average pressure and blend over layer 8.
|
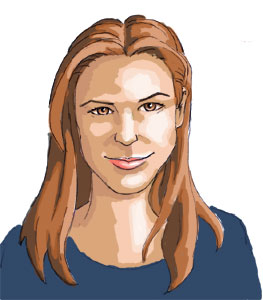
| 10. Pick a lighter colour than the last step to push down layer 9. Orange, peach and white are all possibilities. Then use the colour from step 9 to push down step 8, and the colour from step 8 to push down step 7. When finished, add in a couple extra black lines following the direction of the hair, colour the shirt, and you're done!
| |

| |

