Acrylic Painting Assignment #2: Landscape
Day 1
1. Sky. First, mix blue and white and with a wet brush, paint over the entire board using horizontal strokes. Start at the top and work down, adding more water to your brush as you go down the board. This will result in a paler colour as you go down. You may wish to add some darker blue to the top and top corners of the sky, again using horizontal strokes.
Let the sky dry completely.
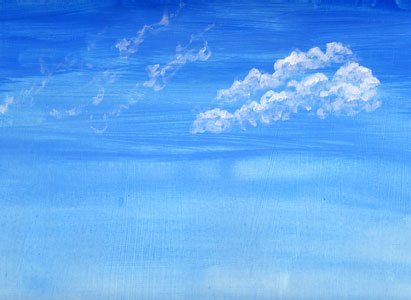
2. Clouds. To make the fluffy clouds on the right, take pure, dry white on a filbert brush. Using a circular stroke, paint the top layer of the clouds. Work from the top down--as the paint comes off the brush, the colour will blend with the blue underneath more. Don't spend too much time in one place, or you will end up with a flat cotton ball. Be sure to leave some blue between one layer and the next. When the paint dries a little, add some fresh white to the very top layer of each cloud.
Whispy clouds, like the ones on the left, can be created by taking a dry brush with most of the paint wiped off, then twisting the brush in circular strokes.
|
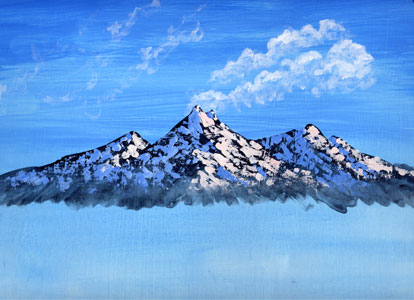
3. Mountain Base. Make a mixture of blue and black. With a damp brush, paint in the basic mountain shapes. Most of your attention should be paid to the top edge. Use water to spread colour down towards the bottom of the mountain, so that the bottom is much more transparent than the top. The bottom of the mountains should be approximately half way down your board.
Let the mountain layer dry completely.
4. Snow. To make the shadow side of the mountains, mix some white into your blue and black mountain colour. Don't over-mix, but leave the paint marbled looking. Tap the tip of your palette knife into the paint, and then spread the paint over the shadow side of the mountain. Pull the knife so that the paint breaks, leaving gaps that you can see the original colour through.
To make the highlight side, mix white with the smallest dab of red. Use the same technique to spread paint on the light side. Don't go to the very bottom of the mountains...leave the transparent area at the bottom free of paint.
Let the mountain layer dry completely.
When the paint is dry, take a wash of white and tap at the base of the mountain to create a pale 'mist'. Let some of this mist show between this layer and the next (below).
|

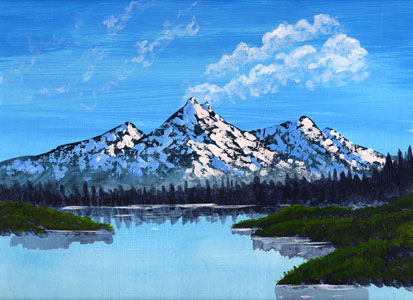
5. Background Trees. Use the same mixture of blue and black like the base mountain colour. Making sure the brush is damp, load paint onto both sides of the brush. Turn the brush edgewise, and pull down without much pressure to create the thin points of the tops of trees. Be sure to leave some of the mist showing above the treetops. Try to keep the bottom of the tree layer fairly flat.
6. Reflections. Before the tree layer is totally dry, take a wet brush with just a hint of tree colour on it. Pull from the bottom of the trees straight down to create reflections. Don't make the reflections thicker than the tree layer itself. To create the waterline, make a mixture of white and water. Tap the edge of a palette knife into it, and cut horizontally along the shoreline. A few horizontal marks elsewhere in the water helps create the illusion of water.
7. Lay of the Land. Using the same blue-black tree mixture, tap in the shapes of the middleground land masses. Leave some space between this layer and the background trees. Use the same method above to create reflections and waterlines.
|
8. Grass Highlights. Create a yellowy-green colour. Load the brush with dry paint. When painting, tap the bristles onto the board so that they bend up 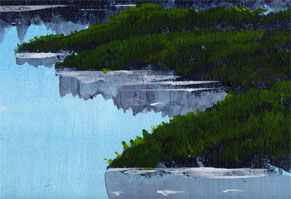 instead of down. By pushing the brush up, feathery grass textures can be created (see enlargement). Decide where ridges in the grass will be, and tap with the most paint there, moving down as the paint comes off the brush so that only the top of each layer is bright green. Leave some dark areas in between to separate the layers.
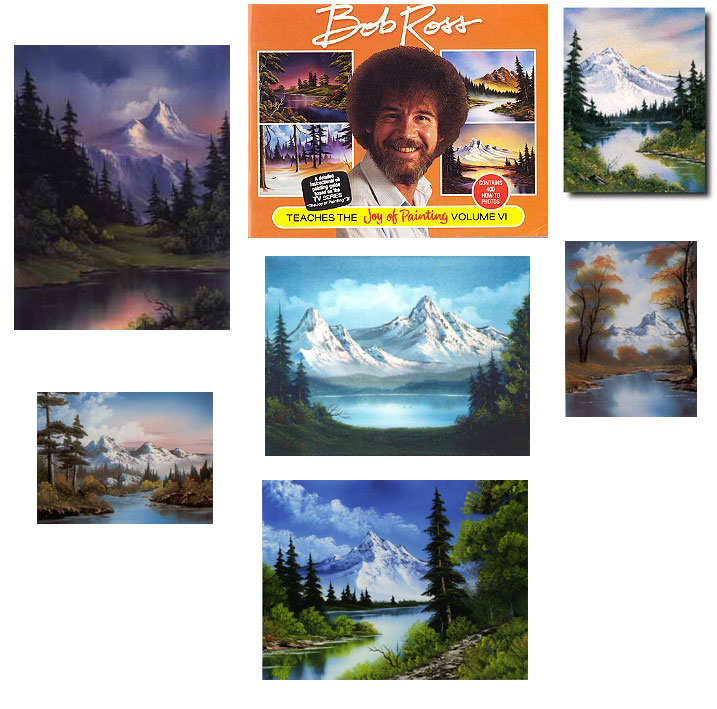
(For those looking for different examples of sky colours and cloud formations, here are some pictures done with this style.)
|

| |

